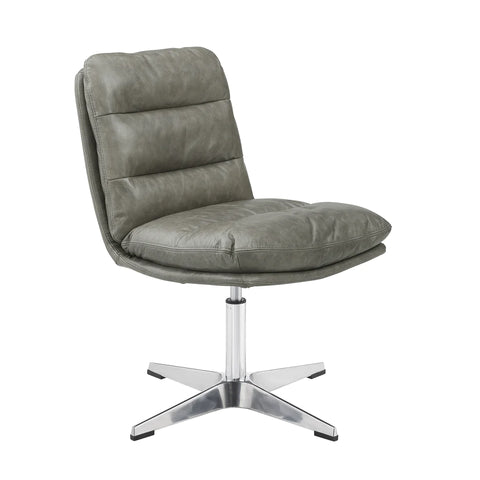
A functional office chair is an essential piece of furniture in your workplace. You can use this furniture when relaxing or working on various projects. All office chairs must have a backrest. The backrest is an important part of the office chair that supports your spine and maintains a proper sitting posture. However, the office chair backrest may become damaged or worn out over time. A damaged chair backrest may lead to pain, discomfort, and other long-term health issues. Thus, it'll be vital to repair a damaged or worn-out backrest to maintain the comfort and health benefits of your office chair. Read through to understand the step-by-step guide on how to repair your office chair backrest.
|
Contents[hide]
|
Step 1: Identify the Problem
The first step in repairing your office chair backrest is identifying the main issue or problem. How can you identify the problem with your chair's backrest? Start by checking or inspecting for any visible signs of damage, like tears, cracks, or worn-out foam. For example, flattened foam might be one of the major problems. Thus, you'll need to address it when repairing. In addition, inspect the fabric covering the backrest. You can also check for the presence of any wear & tear and damage.
Step 2. Gather the Necessary Tools and Materials
Start gathering the necessary tools and materials after identifying the problem. Ensure you have all the necessary tools and materials before you begin the repair process. What materials and tools do you need for the repair process? You'll need a staple gun, replacement foam, pliers, and a screwdriver. Remember to include some upholstery fabric. You can collect these materials at the nearby local home improvement store or online vendors.
Step 3. Remove the Backrest from the Office Chair
You can't repair the backrest while still on the office chair. Thus, it'll be good to remove it from the chair. Removing it from the chair enhances proper access. Are you wondering how you'll remove the backrest from your chair? Start by turning the chair upside down. Then locate the screws that attach the backrest to the chair. Remove these screws using your screwdriver before detaching the backrest carefully from the chair. Ensure that you place the screws safely to prevent losing them.
Step 4. Remove the Upholstery Fabric
Proceed to remove the upholstery fabric from the backrest. You can only move to this step after removing the backrest. How will you remove the upholstery fabric appropriately? Remove the staples or tacks holding the fabric on the backrest using the pliers. Use the pliers carefully as you remove the tacks or screws to prevent damaging the fabric. Remember, you'll be using the fabric again.
Step 5. Replace the Foam
Replace the foam inside the backrest if they're flattened or worn out. Start by removing the old foam before replacing it with the new one. Remember to use the same thickness and size of foam in the backrest. Ensure you get the right measurements of the foam before sourcing it from the nearby home improvement store or online. You can use your tape measure to determine the right thickness and size.

Step 6. Attach the New Upholstery Fabric
You can embark on reattaching the new upholstery fabric after replacing the foam. How do you reattach the upholstery fabric to the backrest? Start by laying the fabric over the foam before pulling it tight. Use the staple gun to reattach the fabric securely to the backrest. Ensure that you pull it tight as you go. Start from the top of your chair's backrest as you work your way down. Experts recommend that you keep the fabric smooth and wrinkle-free.
Step 7. Reattach the Backrest to the Office Chair
Reattach the backrest to the chair after you've finished repairing it. Use the screws you removed in Step 3 above to reattach the backrest to the office chair. Ensure you've attached the backrest securely to the chair. It helps prevent issues after you've started using the chair once again. Test the backrest before you place the chair back in its position in the office. Testing the backrest helps you check the stability and functionality before using it.
Related Reading: how to assemble childs swivel desk chair?
We recommend:
Summing Up
Repairing your office chair backrest is a simple process that can save you money and extend the life of your chair. You can follow the above steps to identify and fix this problem with ease. At Art Leon, we're passionate about creating functional and stylish furniture that enhances your daily life. Whether you're looking for outdoor or indoor furniture and accessories, we can help you find the perfect one. Check this Open chair backrest.


